Painting can be extremely time consuming. For me, my full time job is being a stay-at-home mom, and Kidspired Creations is my nap time job (I have recently discovered other
Nap Time Crafters like me). After doing this for a few years now, I can (most often) now get one order done while the boys nap. And I feel pretty accomplished doing that :-)
This week, however, I took on a bigger project... a project that was going to take me several nap times to paint, and on top of that it was a rush order. Lucky for me, my mom was coming down to Cajun Country for a few days to play with the boys. This gave me plenty of time to start and finish. In exchange, I bought her a taco.
Less than a year ago
I painted letters for Ava's nursery and her mom, Amanda, wanted a toy box to match. The toy box is a gift for little Ava's first birthday! I do a lot of gifts for babies, but this is my first 1st birthday gift! Very excited!!!
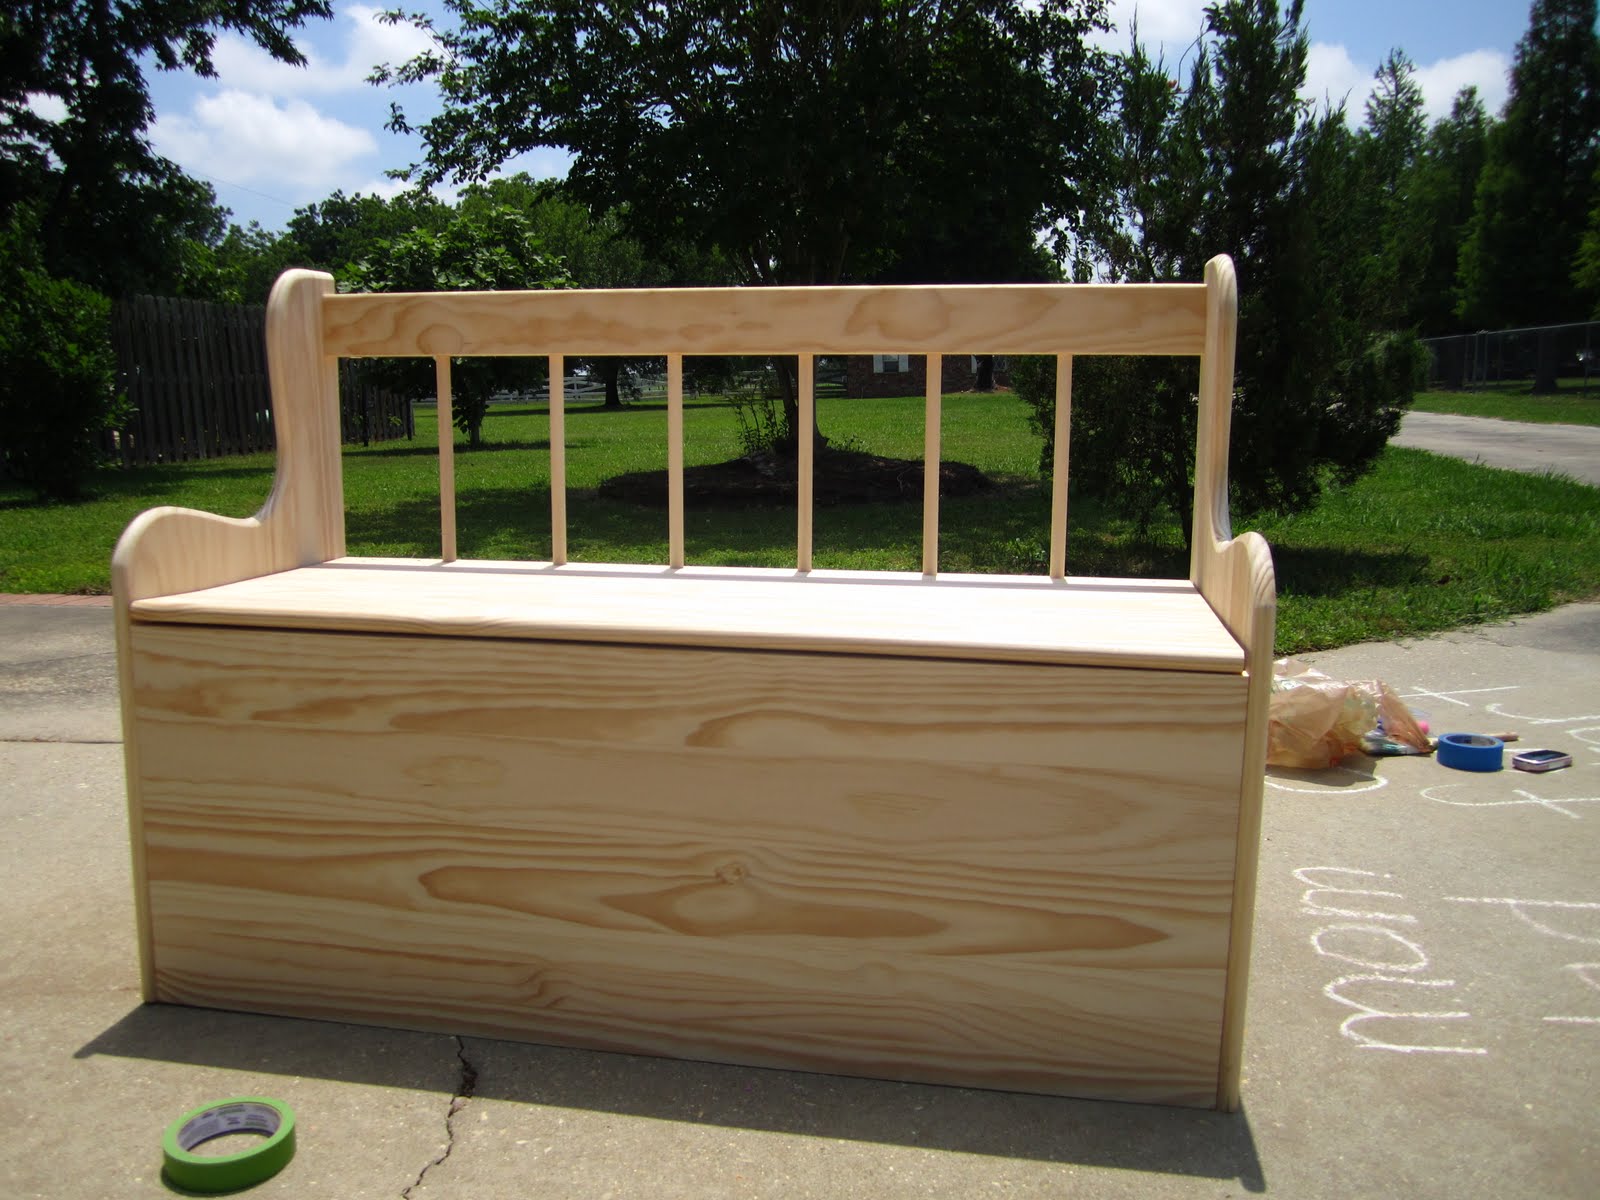
Note: This is a specialty item, not a normal sale item. Amanda purchased the high back, bench-style toy box at an unfinished furniture store and hand delivered it to me. I do not sell furniture, but I sometimes do paint specialty items if they meet my specifications and if I have the extra time lying around. Please e-mail me at kidspiredcreations@gmail.com if you have questions.

Unfinished furniture is ideal because it comes perfectly sanded and ready to paint. It does not have any paints, stains or sealants that would prevent the paint from sticking, or that would require me to completely sand to get down to the real wood. I don't mind doing light sanding, but I don't have the tools or manpower to power sand an item this size. Plus, I hate sanding. That's the real reason ;-)
I absolutely love the high back on this toy box because it can double as a bench. This toy box/bench can multi-task like a mom!
Helpful Hint #1: When removing hardware, keep all of it together in one baggie so you don't lose pieces. Use tape to attach the bag to your project so that you don't lose ALL the pieces. If you have different sized screws that attach to different hinges, for example, tape those screws to that specific hinge so you don't forget what belongs where.
Now we can begin...
I purchased a quart (32 fl. oz.) of
semi gloss white paint that is ideal for indoor and outdoor wood and metal. I chose semi gloss because it is a lot easier to clean than flat paint. I did not choose a gloss or high gloss paint because it would have made all the white on the bench shinier than the design that I was painting on top... and that's the part that I want to POP, not the sheen of the background color. Also, the Rustoleum brand Painter's Touch paint has "easy soap & water clean-up" anyway, or so the can says, so double the ease of getting those crayon markings off.
One quart was more than enough for 2 coats of paint; I still have 1/4 can left. I left the back wall and bottom of the inside of the box unpainted because toys are going to bang up the inside pretty badly. I did not want any paint chipping off and sticking to toys that have been stuck at the bottom for too long. Not that I assume this is going to happen, but just precaution.
I wanted the toy box to match Ava's letters, but I thought polka dots over the entire thing would be a bit much, so I decided to do stripes on the lid. I used
FrogTape (it's "the only painters tape that is treated with PaintBlock technology.") What does that mean? It means that you always get crisp edges on your stripes. Normally I have to touch up the edges of stripes if I use regular painters tape, but not with FrogTape... this stuff is magic!
I don't often measure my stripes if there are natural places to put them (i.e. between the bars on the back of the toy box). I just eyeball it. That being said, I think I have a gift for seeing straight. If you do not feel comfortable making a straight line, then use a level, measuring tape, straight edges, etc. I do not mark my art with pencil lines because it doesn't always come off, or if it does, it leaves an eraser mark... so no pencil lines mmmkay?
 |
| This was a last-minute idea before I started the dots. |
When adding letters to the lid, I started in the center and worked out to the right before coming back and writing the letters on the left. Always consider a "space" between words as an additional letter. So "Ava_Rayne" is 9 letters (if I have an "i" or "l" in a name, I sometimes consider them 1/2 letters because they don't take up much room, and "m" and "w" 1 1/2 letters). This means my capital "R" is my center letter which is perfect because it'll look good to have a big bold letter in the middle. I wrote all of "Rayne" before coming back with the "A" to write Ava. The "e" in Rayne was about 1/2 inch from the Frog Tape border, so I painted the "A" 1/2 inch from the other border.
Helpful Hint #2: I wrote the letters first so I could rest my wrist down without setting it in paint. It helps to get a steadier hand. Then I painted the stripes when I was done with the name.
Sneak Peek:
FrogTape use #2: I used the INSIDE of the FrogTape roll to make my circles for the dots. Perfect size! It made the painting of the dots go soooo much more quickly than normal because I didn't have to be so careful around the edges of the circle. Instead of tracing the circle, I just used the roll as a stencil and painted on the inside. I only had to do a few touch ups which leads me to...
Helpful Hint #3: When using a stencil, wipe off the paint between uses so that you don't get stray paint where you don't want it. Lesson learned.
Helpful Hint #87: When reattaching hardware, get all of the screws about half way in before tightening them the rest of the way. This will allow the hardware to wiggle around to adjust itself before settling in its perfect position. Tightening one screw at a time can cause you to scratch your paint if the hardware moves around when it is that tight against the surface. I also took pictures of the inside lid hinge so I could remember how to attach it correctly. There's another helpful hint. You're welcome.

If Ava is anything like my boys, she is going to be climbing on and in this toy box, throwing toys on, at and in it, and jumping off of it, I used a clear acrylic spray sealer to keep the paint from chipping. And I put 3 coats on it for extra measure ;-) I guess being a mom of boys has taught me well.
Timeline: Monday, 1st coat of paint, Tuesday, 2nd coat of paint, Wednesday, break ;-), Thursday stripes, name and flowers, and Friday polka dots, touch ups and sealer. Phew! But wow! I am so happy with the result!
Kidspired's Creation
Winnie was such a trooper when we had to transport this back to Baton Rouge. She shared the backseat of the Honda Civic with the toy box. Good dog.


 Unfinished furniture is ideal because it comes perfectly sanded and ready to paint. It does not have any paints, stains or sealants that would prevent the paint from sticking, or that would require me to completely sand to get down to the real wood. I don't mind doing light sanding, but I don't have the tools or manpower to power sand an item this size. Plus, I hate sanding. That's the real reason ;-)


 If Ava is anything like my boys, she is going to be climbing on and in this toy box, throwing toys on, at and in it, and jumping off of it, I used a clear acrylic spray sealer to keep the paint from chipping. And I put 3 coats on it for extra measure ;-) I guess being a mom of boys has taught me well.


No comments:
Post a Comment
Hi, this is Casey! Thank you for your interest in Kidspired Creations! Please leave a message below so I know that you stopped by and please, e-mail me at kidspiredcreations@gmail.com if you have any questions about my art.